在 Laravel 使用 Headless Chrome 輸出 PDF
在 Laravel 使用 Headless Chrome 輸出 PDF
前言
使用 Laravel 進行開發,免不了會有一些文件報表套印的功能,
例如電商網站會需要列印訂單、公司內部系統需要銷售統計報表等等......
本篇教學會使用 Headless Chrome 與 Chrome PHP 來產生 PDF 檔案,
也會附上一些踩坑心得與解決方法。
常見解決方案
當聽到 PDF 檔案產製的需求一般都是直接 Google
比較常看到的解決方案大概如下:
既然有這麼多套件可以幫助,為什麼還要寫個文章呢?
為了混分 XD
業務場景問題
mpdf 的官方文件 About CSS support and development state 給出了答案。
一言以蔽之:套件舊了,對於瀏覽器的新樣式支援跟不上了。
dompdf 官方文件寫了這句:
Handles most CSS 2.1 and a few CSS3 properties, including @import, @media & @page rules
重點就是這個 few CSS3。
(所以我說那個樣式呢?)
laravel-dompdf 是基於 dompdf 的再封裝,也會有樣式支援不足的問題。
laravel-snappy 是透過 QT Webkit 渲染引擎來輸出 PDF,
但是 QT Webkit 與目前主流的瀏覽器引擎不同。
QT Webkit 是基於開源的 WebKit 引擎開發,
QtWebEngine 則是基於 Chromium 的 Blink 引擎,
所以在渲染結果上會出現誤差的可能。
如果文件的樣式不複雜,或是使用者對於誤差的容忍度高,那麼使用上述的方案固然沒問題;
反之,上述的套件受限於 CSS 版本,在文件的設計與測試上會花費許多時間做調整。
Headless Chrome 介紹
看看官方文件怎麼說:
Headless Chrome is shipping in Chrome 59. It's a way to run the Chrome browser in a headless environment
其實就是用命令列執行 Chrome 瀏覽器的功能,
可用於執行網頁測試、列印、截圖等功能。
版本資訊
從 Chrome 59 就包含了 Headless Chrome ,支援 Mac 和 Linux 作業系統。
從 Chrome 60 則是跟進支援 Windows 作業系統。
安裝套件
本次要使用的套件為 Chrome PHP。
主要是把執行 Headless Chrome 的指令進行封裝,省下自己寫指令的麻煩。
先決條件
- PHP 7.4-8.2。
- 安裝 Chrome。
安裝 Chrome 瀏覽器
這裡列出三種開發環境的安裝方式。
以作業系統 Ubuntu 22.04 為例,
如果是桌面版本的就跟 Windows 的方式一樣。
但是如果只有文字介面可參考以下安裝方式。
更新套件列表
sudo apt update下載 Chrome 穩定版本
wget https://dl.google.com/linux/direct/google-chrome-stable_current_amd64.deb安裝 Chrome
sudo apt install ./google-chrome-stable_current_amd64.deb加入 gpg 金鑰
wget -q -O - https://dl.google.com/linux/linux_signing_key.pub | sudo gpg --dearmour -o /usr/share/keyrings/google_linux_signing_key.gpg加入 Chrome 套件庫
sudo sh -c 'echo "deb [arch=amd64 signed-by=/usr/share/keyrings/google_linux_signing_key.gpg] http://dl.google.com/linux/chrome/deb/ stable main" > /etc/apt/sources.list.d/google.list'更新套件列表
sudo apt update下載 Chrome 穩定版本
sudo apt install google-chrome-stable這個坑比較多......
如果是參考官方教學文件的方式 Getting Started On Linux
由於容器中的環境都是被隔離的,所以裝在作業系統是沒有用的。
首先要先進入跑 Laravel 的容器再安裝 Chrome,
這樣才能正確執行到 Headless Chrome。
更新套件列表
apt update下載 Wget
apt install wget下載 Chrome 穩定版本
wget https://dl.google.com/linux/direct/google-chrome-stable_current_amd64.deb安裝 Chrome
apt install ./google-chrome-stable_current_amd64.deb安裝 Chrome PHP 套件
這個就比較簡單了,用 Composer 安裝就可以了
如果是用 Docker 記得一樣要先進入容器與專案目錄再安裝。
composer require chrome-php/chrome使用範例
這裡展示 Laravel 基本 MVC 的作法,
使用 Bootstrap 5 來作為簡單的使用範例。
新增 View
直接用 Bootstrap 5 的一些表單元件做測試,
如果要用自己的 CSS 樣式,
可參考 Laravel 官方教學的靜態資源引用。
resources/views/report/test.blade.php
<!DOCTYPE html>
<html lang="en">
  <head>
    <meta charset="utf-8" />
    <meta name="viewport" content="width=device-width, initial-scale=1" />
    <title>Bootstrap demo</title>
    <link
      href="https://cdn.jsdelivr.net/npm/[email protected]/dist/css/bootstrap.min.css"
      rel="stylesheet"
      integrity="sha384-4bw+/aepP/YC94hEpVNVgiZdgIC5+VKNBQNGCHeKRQN+PtmoHDEXuppvnDJzQIu9"
      crossorigin="anonymous"
    />
  </head>

  <body>
    <div class="container-md">
      <h1>Hello, world!</h1>

      <table class="table">
        <thead>
          <tr>
            <th scope="col">Class</th>
            <th scope="col">Heading</th>
            <th scope="col">Heading</th>
          </tr>
        </thead>
        <tbody>
          <tr>
            <th scope="row">Default</th>
            <td>Cell</td>
            <td>Cell</td>
          </tr>

          <tr class="table-primary">
            <th scope="row">Primary</th>
            <td>Cell</td>
            <td>Cell</td>
          </tr>

          <tr class="table-success">
            <th scope="row">Success</th>
            <td>Cell</td>
            <td>Cell</td>
          </tr>
          <tr class="table-danger">
            <th scope="row">Danger</th>
            <td>Cell</td>
            <td>Cell</td>
          </tr>
        </tbody>
      </table>
      <a href="{{ route('download') }}">
        <button type="button" class="btn btn-primary">印出來</button>
      </a>
    </div>
  </body>
</html>
新增 Controller
新增兩個方法,一個用於展示畫面,一個用於輸出檔案。
app/Http/Controllers/ReportController.php
<?php

namespace App\Http\Controllers;

use Illuminate\Http\Request;
use Illuminate\Support\Str;
use Illuminate\View\View;
use HeadlessChromium\BrowserFactory;

class ReportController extends Controller
{
    /**
     * 顯示文件畫面
     */
    public function show(): View
    {
        return view('report.test');
    }

    /**
     * 透過 Headless Chrome  產出 PDF
     */
    public function download()
    {
        // 產生 Blade 引擎渲染後的 HTML 字串
        $render = view('report.test')->render();
        $browserFactory = new BrowserFactory();
        // 如果在容器中使用要加入這段
        $browserOptions = ['noSandbox' => true];
        $browser = $browserFactory->createBrowser($browserOptions);
        $page = $browser->createPage();
        $page->setHtml($render);
        // 列印頁面設定
        $pageOptions = [
            'marginTop' => 0.0,
            'marginBottom' => 0.0,
            'marginLeft' => 0.0,
            'marginRight' => 0.0,
            'paperWidth' => 8.3,
            'paperHeight' => 11.7,
            'printBackground' => true,
        ];
        // 產生隨機檔名並存放於暫存資料夾
        $random = Str::random(40);
        $savePath = storage_path('temp') . '/' . $random . '.pdf';
        $pdf = $page->pdf($pageOptions);
        $pdf->saveToFile($savePath);
        $downloadName = "{$random}.pdf";
        // 下載檔案
        $response = response()->download($savePath);
        $response->headers->set('content-disposition', "attachment; filename={$downloadName}");
        return $response->deleteFileAfterSend();
    }
}
新增 Route
routes/web.php
<?php

use Illuminate\Support\Facades\Route;
use App\Http\Controllers\ReportController;

Route::get('/', function () {
    return view('welcome');
});

Route::get('/report/show', [ReportController::class, 'show']);
Route::get('/report/download', [ReportController::class, 'download'])->name('download');
畫面展示
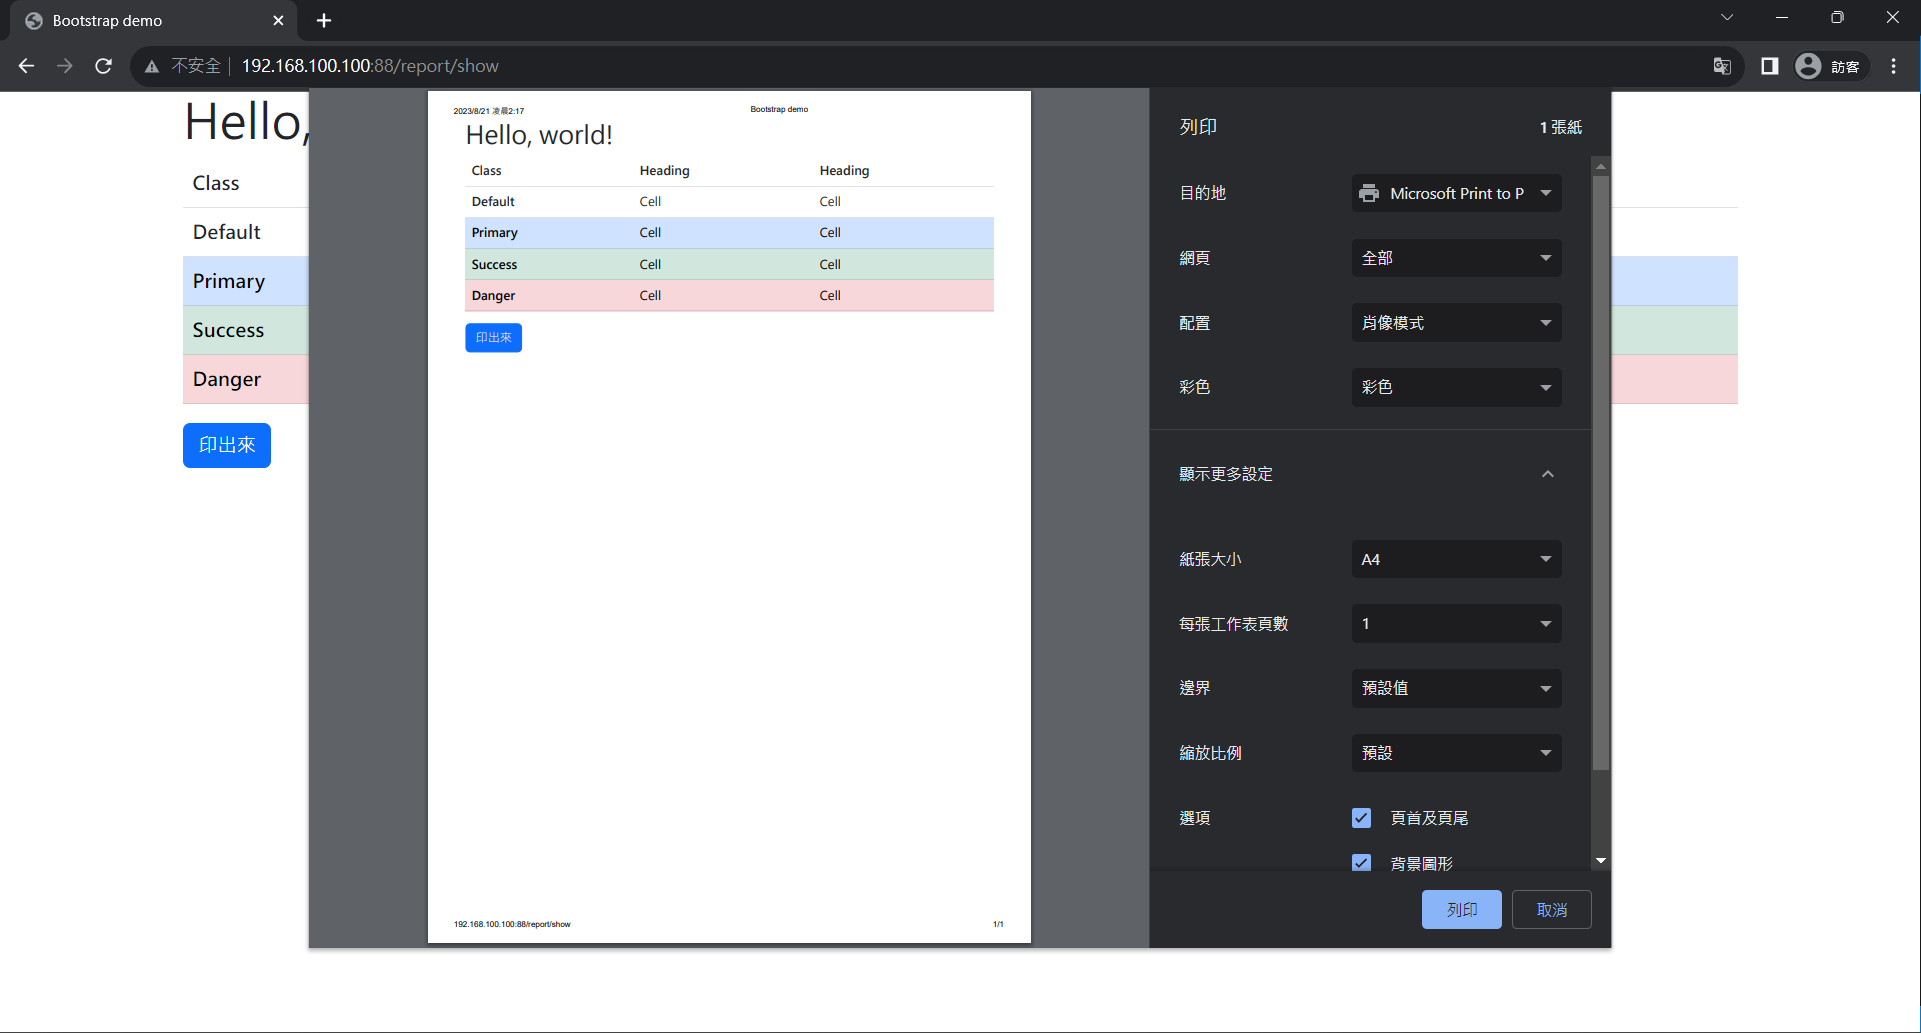
輸入顯示畫面的網址,就可以看到測試的畫面了。
畫面出現之後可以點選右上角的列印功能,
上面的 pageOptions 陣列就是對應列印功能選項。

原則上客戶端的列印選項一樣,那麼伺服器輸出的檔案就會一樣。
詳細可用的設定可以參考官方文件 Print as PDF。
